TL;DR Add a soil in Settings > Soils and enter its Density in kg/m³. Every pile that uses the soil then shows its weight from this density.
Prerequisites
- A project with a storage and a pile, or the plan to add one. See Creating Storage Places in the Infomap.
- The density of your material in the unit shown next to the Density field (kg/m³ in a metric project).
Where densities are stored
The density belongs to a soil, and soils are listed in the project under Settings > Soils. The table shows Name, Cost, Loosening factor, Excavation/Landfill, Density, and Actions. A pile points to one soil, so one density serves every pile that uses it.
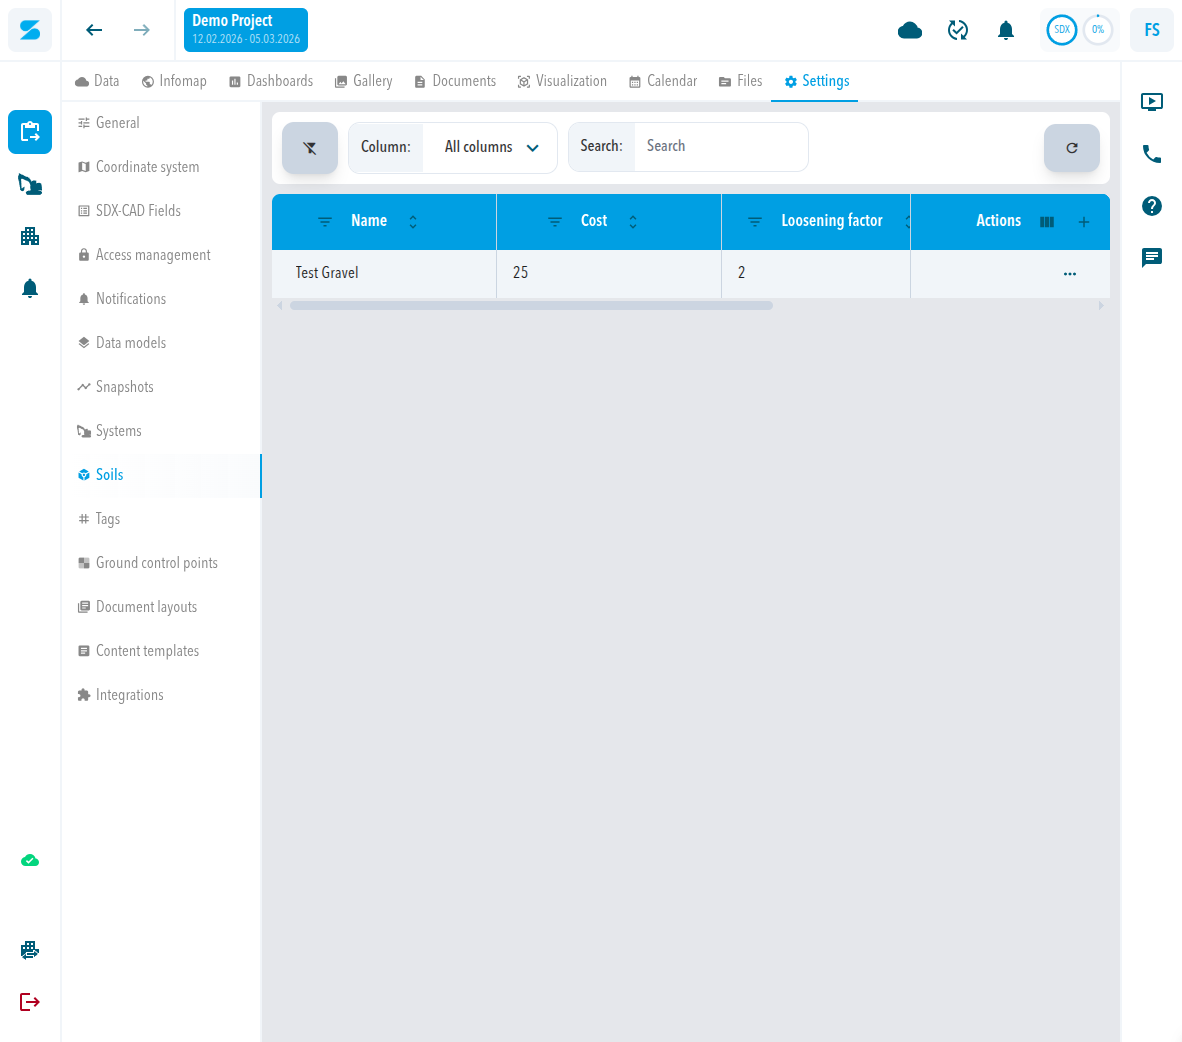
Add a soil with a density
- Open the project and select Settings.
- Select Soils.
- Select the add button (+) above the table. The dialog Create a soil opens.
- Enter a name in Name.
- Enter the density in Density. The unit next to the field is kg/m³ with the Metric Measurement unit, and tn/yd³ with US survey feet.
- Optional: enter Costs in the unit shown next to the field (€/m³ in a Euro project). Costs feeds the currency value of a pile.
- Select Create.
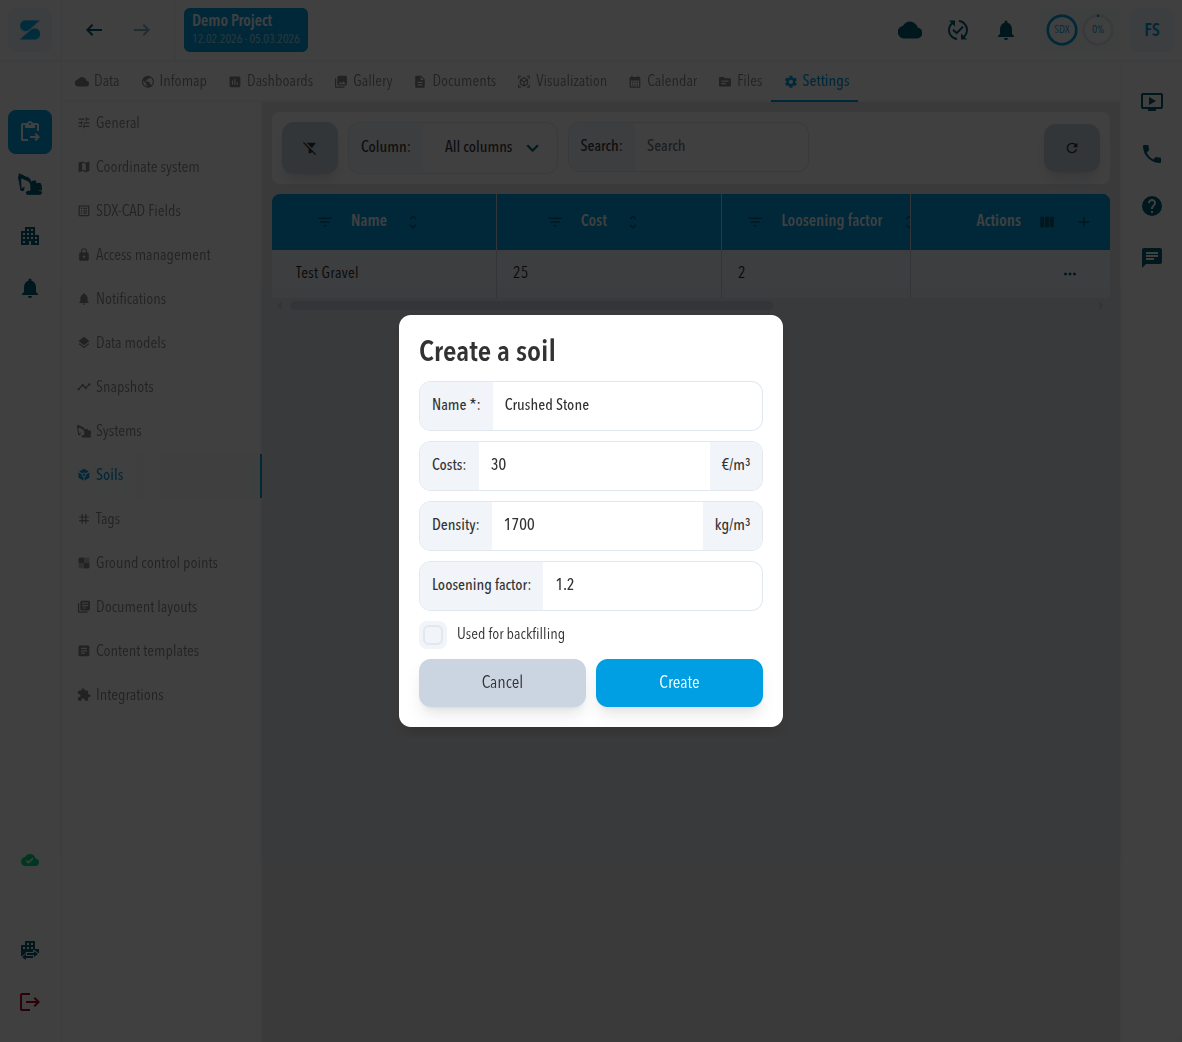
Expected result - add
The soil appears in the table with the Density you entered. When you add a pile in the Infomap, the soil is listed in the Soil list.
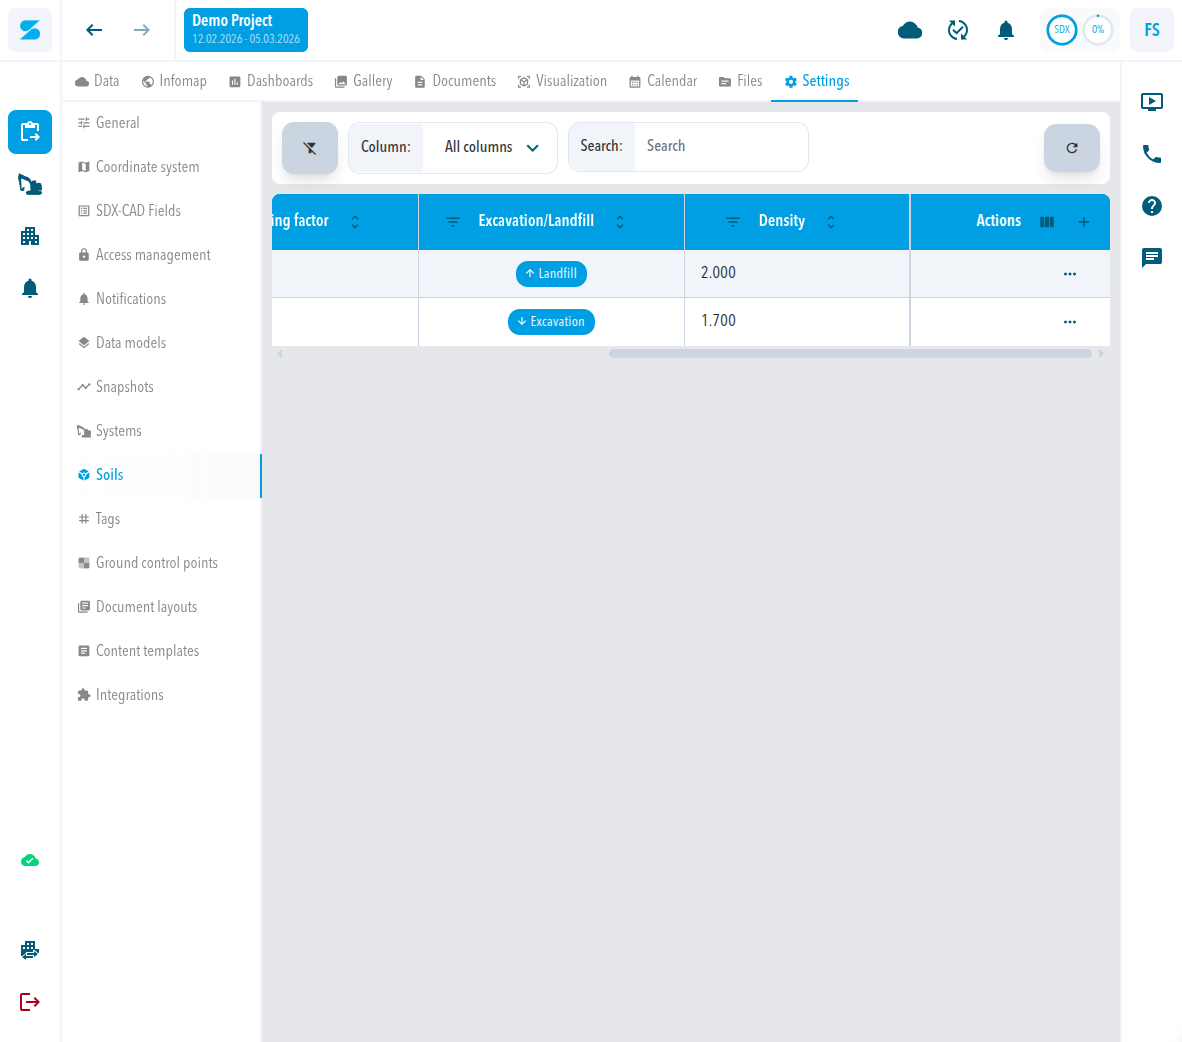
Change a density
- In Settings > Soils, open the three-dot menu in the row of the soil and select Edit.
- Change Density.
- Select Apply.
Expected result - change
The weight of every pile that uses the soil updates. A pile of 9.113 m³ moved from 14.581 t at 1,600 kg/m³ to 18.226 t at 2,000 kg/m³ in a test project.
How the density feeds the tonnage
The Bar chart - storage widget multiplies the volume of each pile by the density of its soil to show the weight. The currency value is the volume multiplied by Costs. See SDX-Cloud: Create a tonnage dashboard. With US survey feet selected in your profile under Settings > Personalization, the widget shows volume in yd³ and weight in tn.
Comments
0 comments
Please sign in to leave a comment.