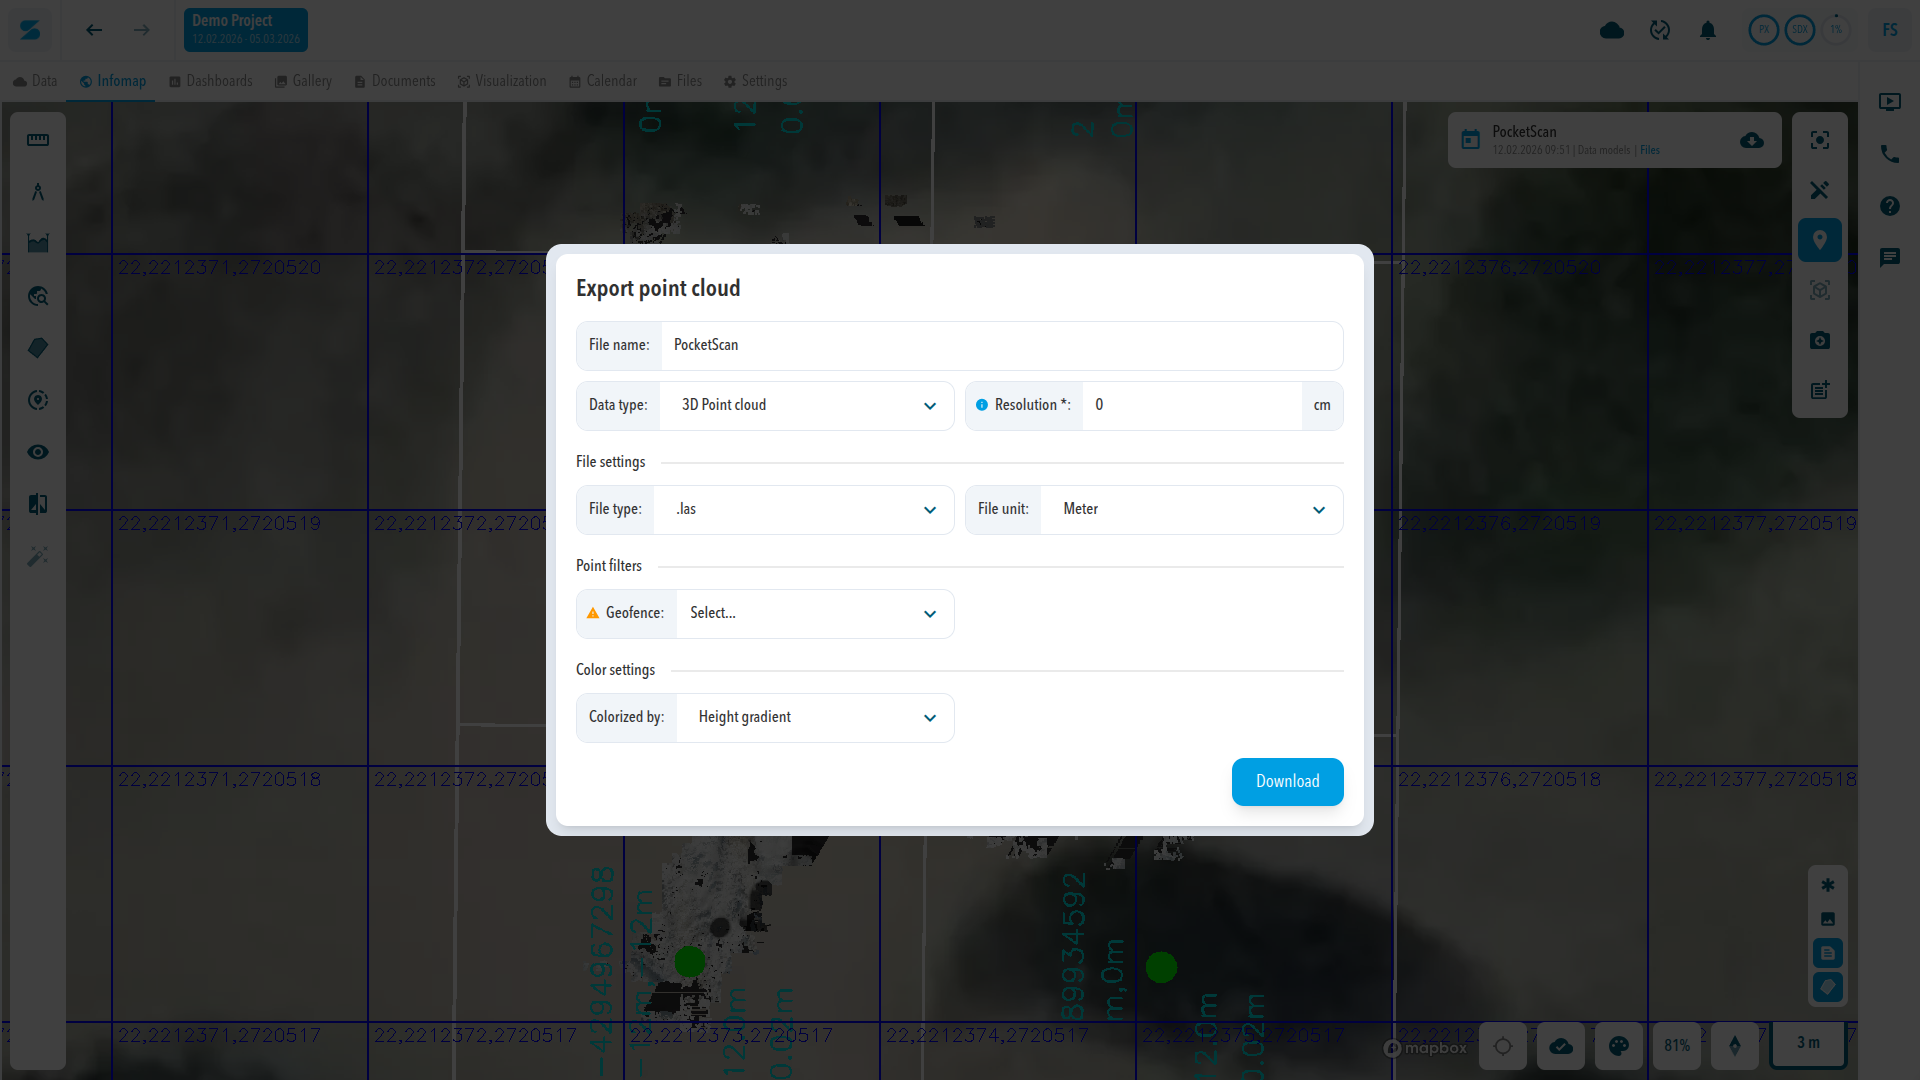
You export a finished data model from the Data tab, or from the Infomap data card. Both open the same Export point cloud dialog. You choose the Data type, set the options that dialog shows for it, and click Download.
Before you start
- The data model has the status Finished in the Data tab.
- You know which file type your CAD or GIS software needs.
Export the data model
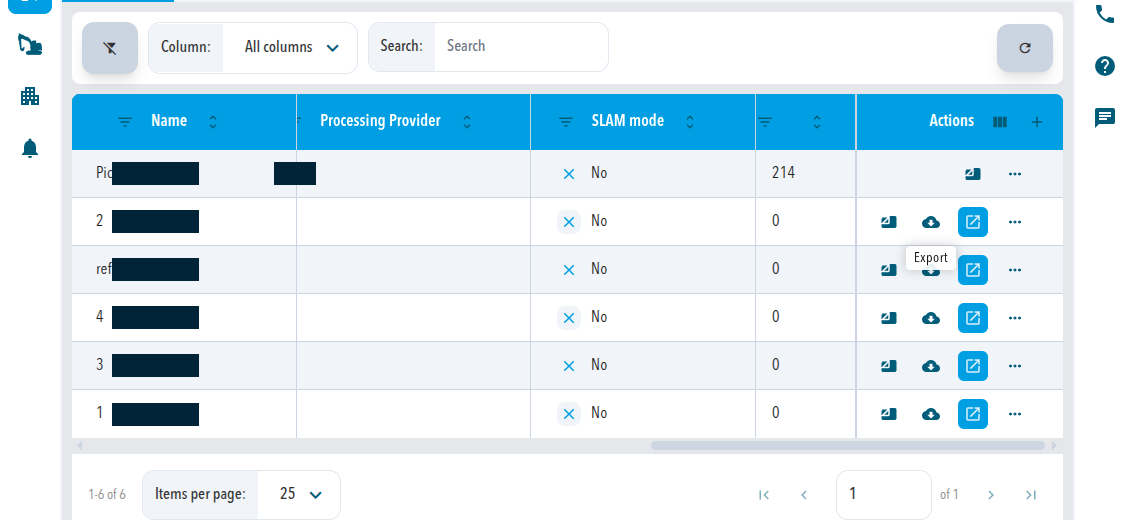
- Open the project and click Data, then stay on Data models.
- In the row of the data model, click the Export icon under Actions. In the Infomap, click the cloud icon (Export) on the data card at the top right instead.
- Under Data type, choose 3D Point cloud, 2D rasterized point cloud, Contours, or Mesh.
- Set the options the dialog shows for that type: resolution, file type, and File unit. Every option is listed in the reference.
- Optional: under Geofence, choose a geofence of the project to export only the points inside it.
- Click Download.
Expected result
The file downloads to your computer with the File name you entered. The dialog is the same from the Data tab and from the Infomap.
For 2D rasterized point cloud, Contours, and Mesh, Version lets you choose Default or Manipulated. Choose Manipulated to export the manipulated version of the data.
Comments
0 comments
Please sign in to leave a comment.