This article shows you, step by step, how to add, edit, deactivate, and delete devices in the new Device Management area of SDX-Cloud.
Before you start
If you haven’t already, read Device Management Overview first. It explains key concepts like Active, Create pins, licenses, and flatrates.
If you haven’t already, read Device Management Overview first. It explains key concepts like Active, Create pins, licenses, and flatrates.
General steps to add a device
The basic steps are the same for all device types:
- Open Organization → Settings → Devices.
- Click the tab for the device type you want to add (for example SDX-PocketScan, Drones, or DJI Docks).
- Click the + button in the top-right corner of the table.
-
In the Add device window, fill out:
- Name: a clear, recognizable name.
-
Serial number: exactly as printed on the device (case-sensitive).
Tip: PocketScan serial numbers are split into multiple parts in SDX-Cloud. See the PocketScan section below for the exact format. - Description (optional): any internal notes.
- Adjust the checkboxes (Active, Create pins, Has license, Has flatrate) as needed.
- Click Continue / Save.
Important
Name and Serial number are mandatory.
The serial number cannot be changed later, and once a license or photogrammetry flatrate is assigned, it is permanent and the device can no longer be deleted.
Name and Serial number are mandatory.
The serial number cannot be changed later, and once a license or photogrammetry flatrate is assigned, it is permanent and the device can no longer be deleted.
Adding an SDX-PocketScan device
Detailed guide (recommended)
For the full step-by-step workflow and screenshots, see SDX-Cloud: How to Add an SDX-PocketScan Device .
For the full step-by-step workflow and screenshots, see SDX-Cloud: How to Add an SDX-PocketScan Device .
- Open the SDX-PocketScan tab and click +.
-
Fill in:
- Name*
-
Serial number* (must match the label exactly; it is locked after saving)
Split the serial at the hyphens and enter each part in the matching field.
Part 1: 5 characters (a–z, 0–9) · Part 2: 8 characters (A–Z, 0–9).
If your device has a third part (…-CC), enable Is extended serial number and enter Part 3 (2 characters, letters/numbers). - Description (optional)
-
Configure options as needed:
- Active: enable to process uploads automatically.
- Create pins: enable to create Infomap pins automatically.
- Has license / Has flatrate: assign only if applicable (irreversible).
- Click Continue to save.
Important
If the PocketScan uploads data but the serial number is not registered in SDX-Cloud (or registered in the wrong format), uploads will fail.
If the PocketScan uploads data but the serial number is not registered in SDX-Cloud (or registered in the wrong format), uploads will fail.
Note
PocketScan devices can have both a Sodex Mobile mapping license and a flatrate assigned.
Assigning either one is irreversible and will also prevent deleting this device later.
PocketScan devices can have both a Sodex Mobile mapping license and a flatrate assigned.
Assigning either one is irreversible and will also prevent deleting this device later.
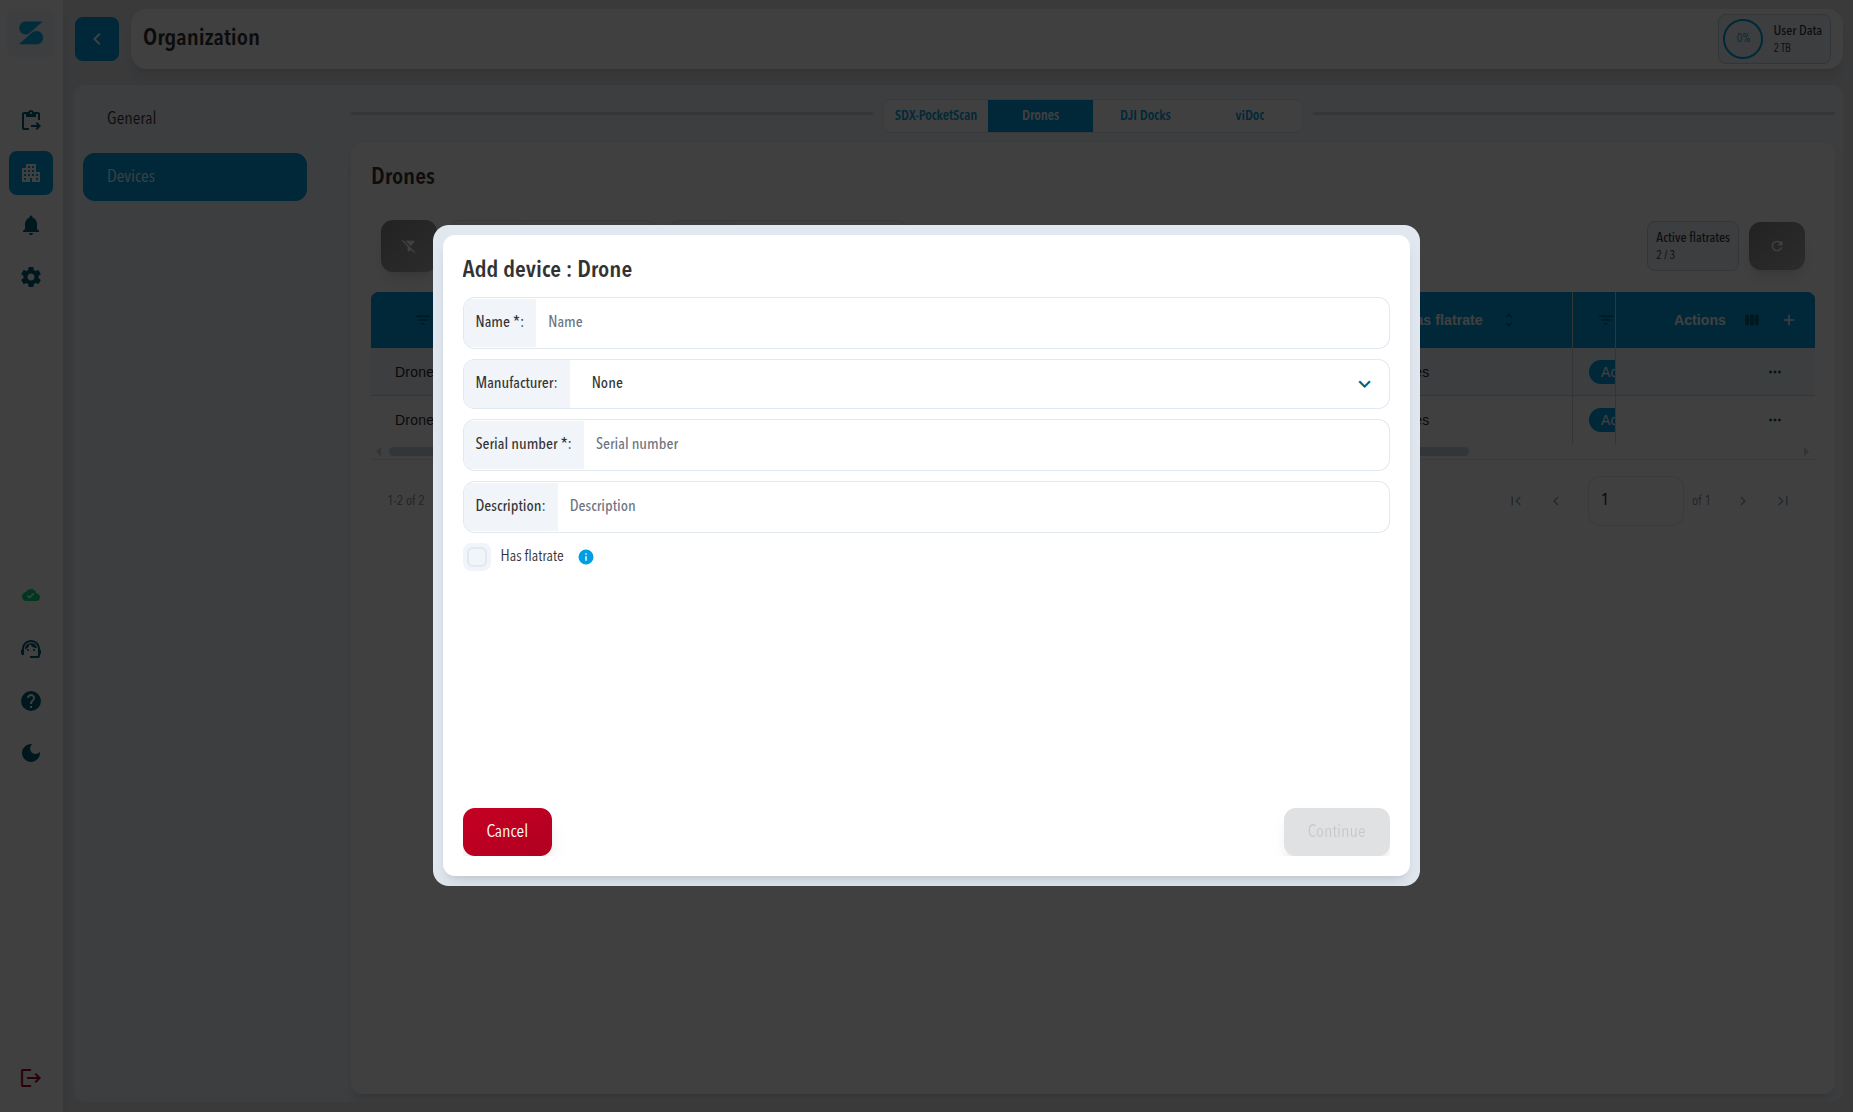
Adding a Drone
- Open the Drones tab and click +.
-
Fill out:
- Name*
- Manufacturer: select the manufacturer (e.g. DJI).
- Serial number: enter the drone’s serial and double-check before saving.
- Description (optional)
-
Configure:
-
Active
- Turn on if this drone’s flights should be processed automatically.
-
Has flatrate
- Tick this if the drone is covered by a photogrammetry flatrate.
- A tooltip reminds you that assigning a flatrate is permanent.
-
Active
- Click Continue to save.
Tip
If you do not assign a flatrate, the drone can still be used with credit-based Sodex photogrammetry processing while credits are available.
If you do not assign a flatrate, the drone can still be used with credit-based Sodex photogrammetry processing while credits are available.
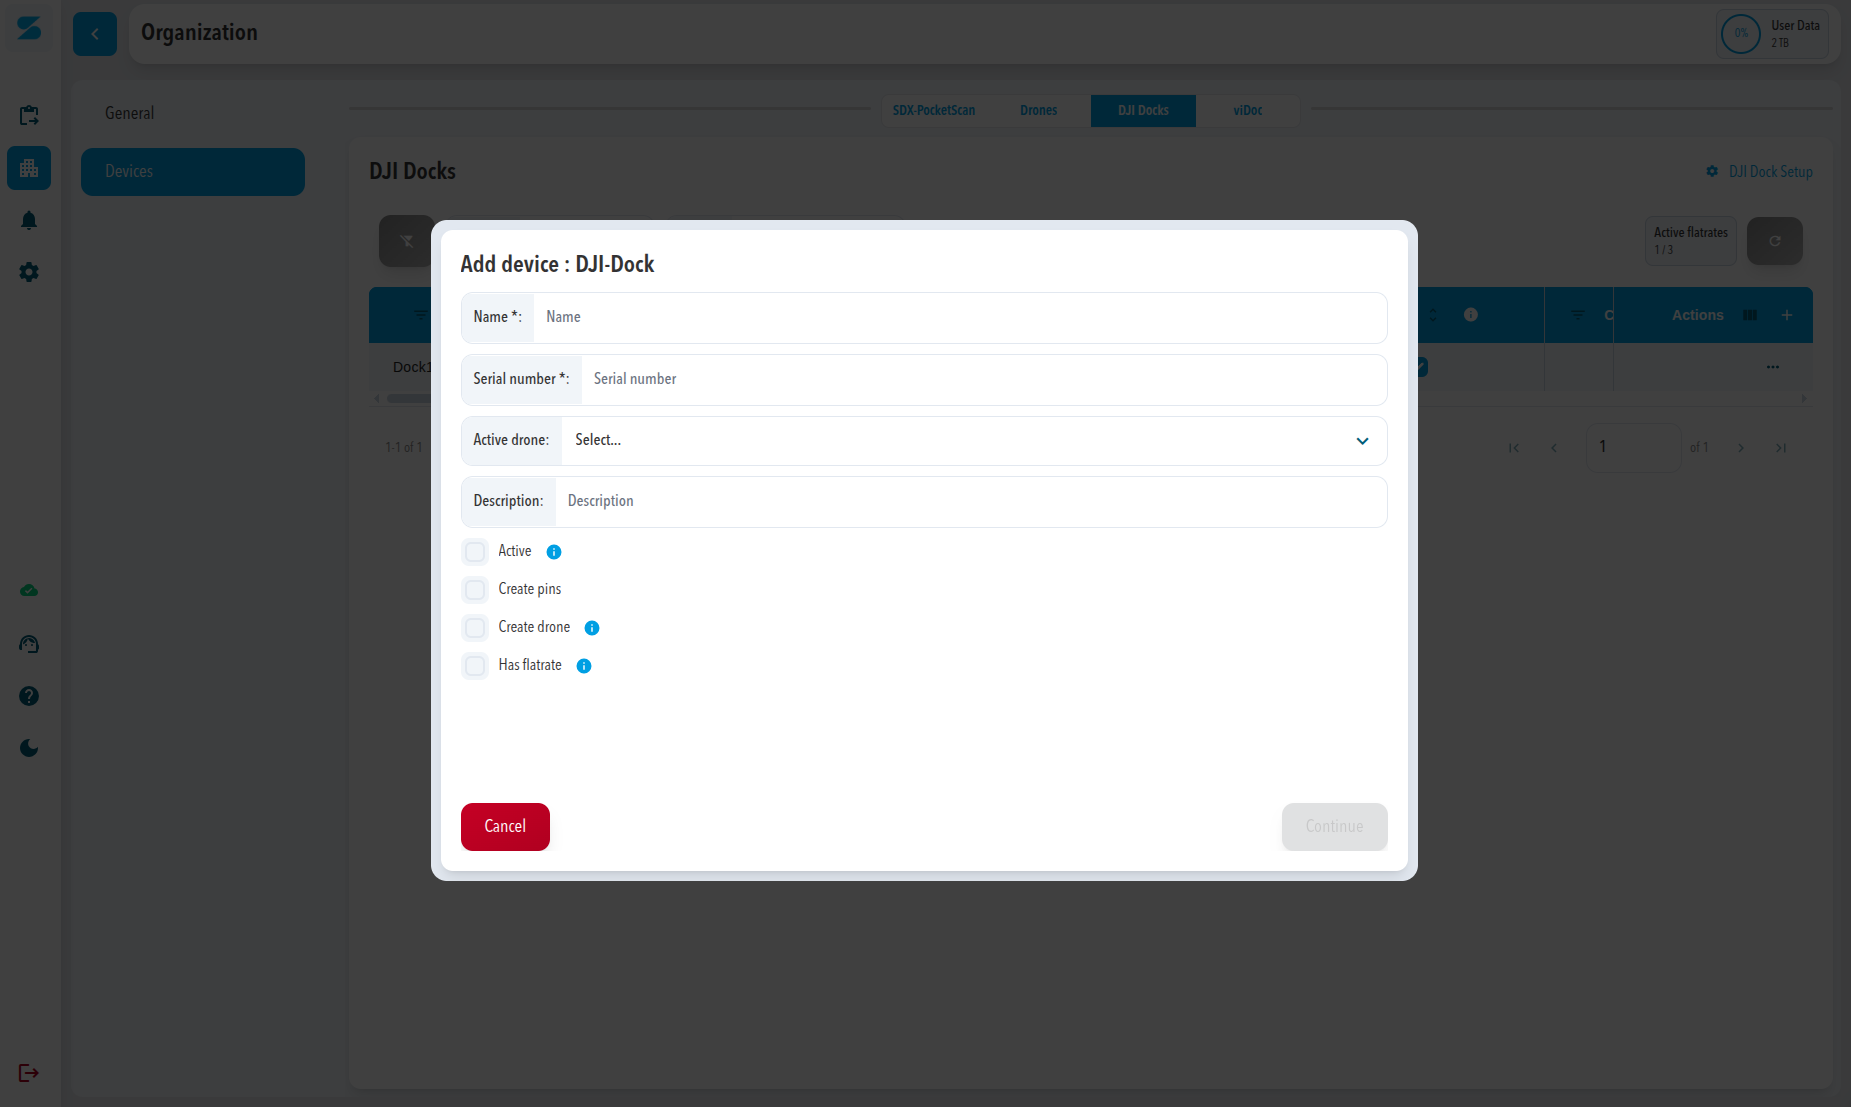
Adding a DJI Dock
Drone assignment required
A DJI Dock must have an active drone assigned. You can either select an existing drone or create a new drone device directly before creating the DJI Dock.
A DJI Dock must have an active drone assigned. You can either select an existing drone or create a new drone device directly before creating the DJI Dock.
- Open the Drones tab.
- If the required drone does not yet exist, click + and create the drone device first (see “Adding a Drone” above).
- Open the DJI Docks tab and click +.
-
Fill out:
- Name*
- Serial number: enter the dock’s serial and double-check before saving.
- Active drone: select the drone that will operate from this dock.
- Description (optional)
-
Configure:
-
Active
- Turn on if flights from this dock should be processed automatically.
-
Create pins
- Turn on to automatically create pins in the Infomap for captures uploaded via the dock.
-
Has flatrate
- Tick this if the dock is covered by a photogrammetry flatrate.
-
Active
- Click Continue to save.
Flexible assignment
You can change the assigned drone later. A drone can also be added to a DJI Dock afterwards via Edit.
You can change the assigned drone later. A drone can also be added to a DJI Dock afterwards via Edit.
Changing or adding a drone to a DJI Dock
You can change the active drone of a DJI Dock at any time.
- Open Organization → Settings → Devices.
- Select the DJI Docks tab.
- In the Actions column on the right side, click the ⋯ (three dots).
- Select Edit.
- In the Active drone field, select a different existing drone or choose a newly created one.
- Click Save.
Result
From now on, flights from this DJI Dock are linked to the newly selected drone.
From now on, flights from this DJI Dock are linked to the newly selected drone.
Comments
0 comments
Please sign in to leave a comment.